
In This Article
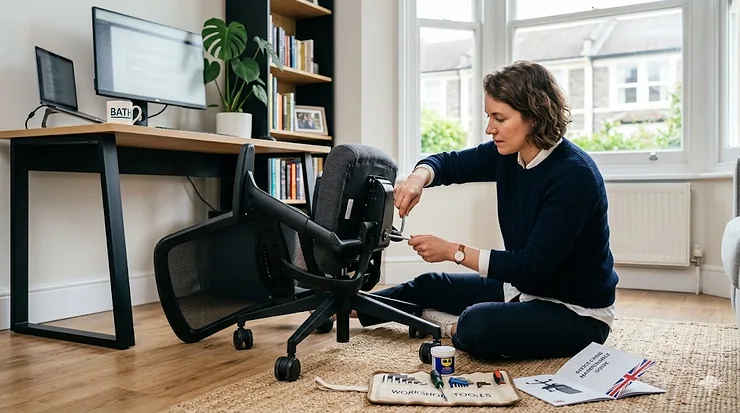
An office chair repair guide is a practical walkthrough for diagnosing and fixing the specific failure in your chair — a sinking seat, a wobbly tilt, a squeaking base — using replacement parts rather than a skip and a credit card. Most chairs don’t die of old age. They die of one small, cheap, entirely fixable component quietly giving up while the rest of the chair carries on being perfectly fine around it.
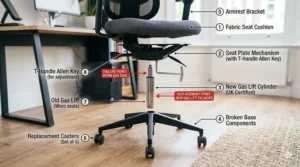
Here’s the thing nobody tells you when a chair starts sinking mid-meeting: the fix is almost never “the whole chair is broken.” It’s usually a £20 gas cylinder, a tired tilt mechanism, or a caster wheel that’s picked up so much carpet fluff it’s basically wearing a jumper. And yet the instinct, for most of us, is to assume the worst and start browsing new chairs on a lunch break, which is exactly the kind of impulse purchase this guide exists to save you from.
We’ve pulled together seven real, currently available repair parts — the actual components that solve the actual problems people search for at 11pm when their chair has just dropped six inches under them — and we’ll walk through what each one fixes, what it doesn’t, and how to tell which one your chair is asking for. Along the way we’ll cover the phrasing you’ll bump into while shopping, from office chair maintenance tips to DIY chair repair parts, so nothing in this guide reads like a mystery.
Quick Comparison Table
Here’s the shape of the repair-parts market before we go deep. Prices are ranges, since they shift with sellers and stock; always check the current price before ordering.
| Repair Part | Fixes | Best For | Price Range |
|---|---|---|---|
| Class 4 Gas Lift Cylinder (heavy duty) | Sinking or non-adjustable seat height | The single most common chair complaint | £15-£35 |
| Gas Lift Hardware Repair Kit (bearing/washer/clip) | Loose or rattling cylinder attachment | Budget fix before replacing the whole cylinder | £8-£15 |
| Tilt Control Mechanism Plate | Won’t recline, stuck tilt, broken lever | Chairs where the recline function has failed | £30-£60 |
| Rollerblade-Style Caster Wheels (set of 5) | Squeaking, sticking or floor-scratching wheels | Anyone rolling around on hard flooring | £12-£20 |
| Replacement Armrest Arm Pads (set of 2) | Cracked, sticky or crumbling arm pads | Cosmetic and comfort fixes, low-risk DIY | £10-£18 |
| Heavy-Duty Chair Base Replacement | Cracked base, wobbly legs, snapped caster socket | Structural failure at the five-star base | £25-£45 |
| Gas Lift Cylinder Removal Tool | Safely removing a seized or stuck cylinder | Anyone about to attempt any of the above | £8-£15 |
Notice the pattern here: nothing on this list costs more than a decent takeaway for two, yet each one solves a problem that, left alone, genuinely ends a chair’s working life. As the Health and Safety Executive’s guidance on workstation assessment makes clear, a chair that can’t be adjusted properly isn’t just annoying — it’s a genuine ergonomic risk, which is as good a reason as any to fix the sinking seat this weekend rather than next year.
💬 Just one click — help others make better buying decisions too!😊
Top 7 Office Chair Repair Parts: Expert Analysis
1. Class 4 Gas Lift Cylinder (Heavy-Duty Replacement) — fixes the single most common chair failure
If your chair sinks the moment you sit down, or won’t hold a height setting for longer than it takes to reach for the phone, the internal seal in the gas cylinder has worn out, and no amount of fiddling with the lever will bring it back. Based on the spec comparison across sellers, a Class 4 cylinder rated to around 1000lbs (roughly 150kg) is the sensible default even for lighter users, since the rating describes the pressurised gas strength, not a weight limit you’re expected to approach.
What most buyers overlook about a sinking chair is that it’s never a “sit differently and it’ll be fine” problem — the internal seal doesn’t self-heal, and the sinking tends to accelerate rather than plateau. Reviewers consistently note that universal-fit Class 4 cylinders, like the widely stocked Duramont-style replacement, slot into the standard 50mm tapered support column found on the vast majority of five-leg office chairs, though it’s worth double-checking your chair’s outer casing measurement before ordering, since a handful of chairs use non-standard fittings.
Here’s what to weigh: swapping the cylinder yourself takes roughly fifteen minutes with a rubber mallet and the removal tool covered further down this list, but the piston itself is genuinely pressurised, so this is one repair worth respecting rather than rushing. UK specialist retailers like Chair Clinic’s guide to office chair gas lifts are a useful reference if you want to double-check your existing cylinder’s class rating and casing measurement before ordering a replacement.
Pros:
- ✅ Fixes sinking and non-adjustable height in one straightforward swap
- ✅ Universal 50mm taper fits the vast majority of five-leg chairs
- ✅ Fifteen-minute DIY job with basic tools
Cons:
- ❌ Requires care around the pressurised piston during removal
- ❌ Non-standard casing measurements occasionally rule out a universal fit
At around £15-£35 depending on the seller and weight rating, this is usually the first part worth checking before assuming your chair is beyond saving.
2. Gas Lift Hardware Repair Kit (Bearing, Washers & Clip) — the cheapest fix worth trying first
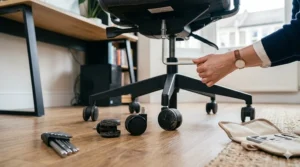
Before you assume the whole cylinder needs replacing, it’s worth ruling out a much smaller culprit: the attachment hardware that clips the cylinder to the support column underneath the seat plate. A kit like the S4451-K bundles a rubber bumper, washers and a retaining clip, and reviewers note it resolves rattling or loose-feeling attachment points that get mistaken for a failing cylinder.
Based on the spec comparison with a full cylinder swap, this kit only makes sense if your actual gas lift is still holding pressure and not sinking — the manufacturer’s own guidance is explicit that a sinking cylinder needs full replacement, not a hardware refresh, since the problem there is the internal seal rather than the external fittings. What most buyers overlook is that this kit is genuinely a “try this first” purchase precisely because it’s inexpensive enough that getting it wrong costs you very little, unlike ordering the wrong tilt mechanism or base.
Pros:
- ✅ Very low cost way to rule out a hardware issue before a full cylinder swap
- ✅ Fits the large majority of standard gas lift cylinders
- ✅ Includes every small part needed in one bundle
Cons:
- ❌ Won’t fix a genuinely sinking cylinder — that needs full replacement
- ❌ Gas lift piston itself isn’t included, only the attachment hardware
Priced around £8-£15, this is the cheapest diagnostic step on this entire list, and arguably the one most people skip straight past on their way to buying something bigger than they needed.
3. Replacement Tilt Control Mechanism Plate — fixes a chair that won’t recline properly
When the recline function locks up, refuses to hold tension, or simply won’t “rotate flat” the way it used to, the tilt control mechanism underneath the seat is usually the point of failure, not the cylinder. An alloy steel plate like the S2979 covers one of the most widely used mounting hole patterns on the market, and reviewers describe successfully using it as a drop-in fit for chairs from several different brands, provided the mounting holes line up.
The spec sheet won’t tell you this, but user reports suggest the tilt tension knob itself is often the actual culprit rather than the whole mechanism — if the chair simply won’t move at all, checking whether the knob is wound too tight is worth doing before ordering a full replacement plate. Based on the spec comparison with buying an entirely new chair, replacing just the tilt mechanism on an otherwise sound frame is meaningfully cheaper and avoids sending a perfectly good seat, back and base to landfill over one failed component.
Pros:
- ✅ Fixes stuck, loose or non-reclining tilt function directly
- ✅ Common 10.2″ x 6″ mounting pattern fits a wide range of chairs
- ✅ Far cheaper than replacing an otherwise healthy chair
Cons:
- ❌ Mounting hole pattern must match your existing chair exactly
- ❌ Doesn’t include the gas lift cylinder, which sits separately on top
At roughly £30-£60 depending on whether you choose the standard or heavy-duty rated version, this is the priciest single part on the list, but usually still a fraction of a new chair’s cost.
4. Rollerblade-Style Caster Wheels (Set of 5) — fixes squeaking, sticking or floor-scratching wheels
Old chair casters tend to fail in one of two ways: they seize up with hair and carpet fibre wound tight around the axle, or the hard plastic wheel starts chewing up wood and laminate floors. A rollerblade-style caster set, using soft polyurethane wheel housings and enclosed ball bearings, addresses both problems at once — reviewers consistently note the sealed bearing design keeps hair and debris out in a way that old-style hard casters simply can’t.
Based on the spec comparison with the plastic casters most budget chairs ship with, the universal 11mm x 22mm stem size fits the overwhelming majority of office chairs (notably excluding IKEA models, which use a different fitting), and installation is genuinely tool-free — pull the old one out, push the new one in. What most buyers overlook is that a full set of five is almost always sold as a set for a reason: replacing just one or two mismatched wheels tends to leave a chair rolling unevenly, which feels worse than the squeak you started with.
Pros:
- ✅ Sealed bearings resist hair and fibre build-up that seizes old casters
- ✅ Soft polyurethane protects hardwood and laminate flooring
- ✅ Tool-free installation in well under ten minutes
Cons:
- ❌ Universal stem size doesn’t fit IKEA chairs
- ❌ Replacing fewer than all five leaves uneven rolling
Typically priced at £12-£20 for a full set, this is one of the highest-satisfaction, lowest-effort repairs on this entire list.
5. Replacement Armrest Arm Pads (Set of 2) — fixes cracked, sticky or crumbling arm pads
PU-covered armrests are usually the first cosmetic casualty on a well-used chair — the coating cracks, flakes, or turns unpleasantly tacky years before the mechanical parts underneath show any real wear. A universal replacement pad set with a standard 4-inch mounting hole pattern swaps on in minutes with a screwdriver, and reviewers describe the fix as genuinely transformative for how a tired chair looks and feels day to day.
Based on the spec comparison with buying a new chair purely because the arms look shabby, this is about as low-risk a repair as exists on this list: worst case, the mounting pattern doesn’t match and you’re out a small amount of money, rather than out an entire chair’s worth of investment. What most buyers overlook is checking the mounting hole distance before ordering — 4-inch spacing is the most common, but several brands use 5-inch or 5.5-inch patterns, and a mismatched pad simply won’t line up.
Pros:
- ✅ Transforms a tired-looking chair’s cosmetic condition in minutes
- ✅ Straightforward screwdriver install with no special tools
- ✅ Low financial risk if you’ve measured the mounting pattern correctly
Cons:
- ❌ Several competing hole-spacing standards mean fit isn’t guaranteed
- ❌ Purely cosmetic — won’t fix any underlying mechanical fault
At around £10-£18 a pair, this is the repair most likely to make a chair look genuinely new again for the least outlay on this entire list.
6. Heavy-Duty Chair Base Replacement (5-Star Base) — fixes a cracked base or wobbly legs
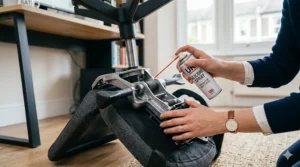
When a chair leans, wobbles on one side, or you can actually see a hairline crack running through one of the five legs, the base itself has failed structurally, and no amount of tightening or lubricating will fix that — the part needs replacing outright. A heavy-duty metal base rated to around 2500lbs and roughly 28 inches across covers most standard five-star chair footprints, with universal gas cylinder and caster socket fittings that accept the same parts already on your chair.
Reviewers note that this is one of the more satisfying big repairs precisely because a wobbling or cracked base often gets misdiagnosed as “the whole chair is falling apart” when, in reality, the seat, back and mechanism above it are usually still perfectly serviceable. Based on the spec comparison with sourcing an exact factory-match base from the original manufacturer, a universal aftermarket base is typically far easier to find in stock and considerably cheaper, though it’s worth measuring your current base’s diameter and socket sizes before ordering to avoid a mismatch.
Pros:
- ✅ Solves structural wobble and cracked-leg failures directly
- ✅ Universal fittings accept your existing cylinder and casters
- ✅ Considerably cheaper than sourcing an exact factory replacement
Cons:
- ❌ Diameter and socket sizes must be measured carefully before ordering
- ❌ A genuinely large repair job compared with the smaller parts on this list
Priced around £25-£45, this sits at the upper end of the DIY repair spectrum, but it’s still a fraction of what a comparable new chair would cost.
7. Gas Lift Cylinder Removal Tool — the tool that makes every other repair on this list possible
This isn’t a glamorous purchase, but it’s arguably the most important one on this list if you’re planning any of the other six repairs. Years of use, dust and dried grease often fuse a cylinder into its housing hard enough that pulling it out by hand simply isn’t happening, and a purpose-built removal tool clamps around the cylinder and lets you apply even, controlled leverage instead of wrestling with a screwdriver and a prayer.
Reviewers who’d previously written off a “stuck forever” cylinder as unsalvageable describe the tool making the difference between abandoning the repair and finishing it in a few minutes. Based on the spec comparison with improvising a removal method, the purpose-built tool avoids the two most common DIY injuries in this repair category: pinched fingers, and a chair seat swinging free once the cylinder finally lets go unexpectedly.
Pros:
- ✅ Removes seized cylinders that resist hand-pulling entirely
- ✅ Purpose-built leverage avoids common pinch and swing injuries
- ✅ Reusable for every future cylinder swap, not a one-time purchase
Cons:
- ❌ An extra purchase on top of whichever cylinder you’re actually installing
- ❌ Still requires reasonable care given the pressurised part involved
At roughly £8-£15, this small tool is the difference between a fifteen-minute repair and an afternoon of frustration, and it’s the one part on this list you’ll likely use again the next time a chair — yours or someone else’s — needs the same fix.
Practical Usage Guide: How to Fix Office Chair Yourself, Step by Step
Fixing an office chair yourself starts with diagnosis, not tools. Sit in the chair and work through the obvious symptoms one at a time: does it sink under weight (cylinder), refuse to recline (tilt mechanism), wobble on one side (base), squeak when rolling (casters), or just look tired around the arms (pads)? Nine times out of ten, the fix is a single part, not a combination, so resist the urge to order everything at once before you’ve actually narrowed down the culprit.
Once you’ve identified the part, clear a bit of floor space, lay down an old towel or sheet (grease and dust from a decade-old cylinder housing goes everywhere), and photograph the chair from a few angles before you start — it’s a genuinely useful reference if you need to remember which washer went where. For a cylinder swap specifically: tip the chair on its side, use the removal tool to grip and pull the old cylinder free, then press the new one into the base with firm, even pressure (a rubber mallet helps) before reseating the seat plate on top.
Common first-attempt mistakes include forcing a cylinder that isn’t actually the right diameter (measure before you buy, not after), over-tightening tilt mechanism bolts to the point of stripping the thread, and skipping the mounting hole measurement on armrest pads or a replacement base, which turns a five-minute job into a return-and-reorder cycle. Take your time on the first repair — the second one, whenever it comes, genuinely does go faster.
Real-World Scenarios: Matching the Right Repair Part to Your Chair Problem
If you’re a home worker whose chair has been sinking a little further every week for the past month, this is the textbook Class 4 gas lift cylinder scenario — budget £15-£35, expect a fifteen-minute job, and don’t bother trying to “adjust around” the sinking, since the internal seal genuinely won’t recover on its own.
If you’re in a shared household office where the chair squeaks and drags every time someone rolls back from the desk, and you’re on hardwood or laminate flooring, the rollerblade-style caster set is the obvious fix — it solves the noise, protects the floor, and at £12-£20 for a full set of five, it’s cheap enough to just do rather than debate.
If you’ve inherited a genuinely old chair — the kind where the arm pads are peeling, the tilt barely holds tension, and one leg of the base has a visible hairline crack — this is where the maths starts to matter. Tally the parts you’d realistically need (cylinder, tilt mechanism, base, casters) against the price of a comparable new chair; if you’re looking at three or more major parts, replacing the chair may genuinely be the better long-term option, which we’ll cover properly a little further down.
Common Chair Problems (And How to Solve Them)
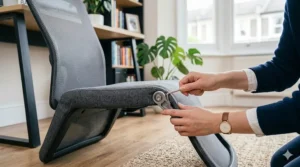
Problem: the chair sinks slowly, or won’t hold height at all. This is a worn internal seal in the gas lift cylinder, and it needs full cylinder replacement — a Class 4 rated to around 1000lbs is a safe default for most home and office use.
Problem: the chair won’t recline, or the lever does nothing. Before ordering a new tilt mechanism, check whether the tension knob has simply been wound too tight — winding it anticlockwise resolves a surprising number of “broken” tilt complaints. If the mechanism genuinely won’t move or has visible damage, a replacement plate like the S2979 is the next step.
Problem: the chair wobbles or leans to one side. Check the base first for hairline cracks around the leg joints — this is a structural failure that a replacement base solves directly, rather than a bolt you can simply re-tighten.
Problem: the chair squeaks, drags, or is chewing up the floor. This is almost always the casters, particularly on hardwood or laminate flooring where hard plastic wheels do real damage over time. A rollerblade-style set with sealed bearings resolves both the noise and the floor damage in one straightforward swap.
Problem: the armrests look and feel tired, cracked or sticky. This is cosmetic rather than structural, and a replacement arm pad set is a low-risk, low-cost fix — just measure the mounting hole spacing carefully before ordering, since several standards exist across different chair brands.
What Is an Office Chair Repair Guide, and When Do You Need One?
An office chair repair guide is a structured reference for identifying which specific component in a chair has failed — the gas cylinder, tilt mechanism, base, casters or arm pads — and matching that fault to the correct replacement part rather than assuming the entire chair needs replacing. You need one the moment a chair develops a single, isolated symptom while everything else about it still works fine, which describes the overwhelming majority of “my chair’s broken” situations people actually encounter.
The reason this matters practically is cost and waste: a chair is a collection of independently replaceable mechanical parts, and treating a £20 cylinder failure as a reason to bin an otherwise sound £200 chair is, frankly, a bit like scrapping a car over a flat tyre.
How to Choose the Right Repair Part: 7 Steps
- Isolate the actual symptom before shopping. Sinking, non-reclining, wobbling, squeaking and cosmetic wear are five different problems with five different fixes — don’t buy a tilt mechanism for a sinking cylinder.
- Measure before you order, every time. Cylinder casing diameter, tilt mechanism mounting hole pattern, base diameter and armrest hole spacing all vary between brands, and a mismatch means a return.
- Try the cheapest plausible fix first. A hardware repair kit before a full cylinder swap, or a tension knob adjustment before a full tilt mechanism replacement, can save you money if the smaller fix turns out to be all you needed.
- Get the removal tool before you need it. Attempting to pull a seized cylinder by hand is where most first-time DIY chair repairs stall out — buy the tool alongside the part, not after you’ve already struggled for twenty minutes.
- Check the weight rating against realistic use, not just your own bodyweight. A Class 4 cylinder or heavy-duty base rated well above your weight gives genuine longevity headroom rather than sitting right at the edge of its rating daily.
- Read genuine review sentiment on fit consistency, not just star ratings. Reviewers across multiple brands consistently flag universal-fit claims as “mostly” rather than “always” accurate — a handful of chair models use non-standard fittings.
- Do the maths before ordering three or more parts. If your chair genuinely needs a new cylinder, base and tilt mechanism simultaneously, compare that combined cost honestly against a new mid-range chair before committing.
Office Chair Maintenance Tips: A Quarterly Routine That Actually Works
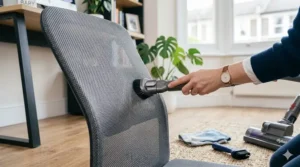
Good office chair maintenance tips aren’t complicated, and the whole routine takes about ten minutes every three months. Start by turning the chair upside down and clearing hair, dust and carpet fibre from around the caster axles — this single step prevents the majority of squeaking and sticking complaints before they start. Wipe down the gas lift cylinder’s exposed chrome or black casing with a dry cloth; grit here accelerates wear on the internal seal over time.
Check every visible bolt, particularly around the tilt mechanism and base attachment points, and snug anything that’s worked loose — new chairs especially benefit from a re-tightening pass after the first month of regular use, since components settle in. Finally, give the tilt tension knob a full range-of-motion check: wind it fully loose and fully tight once, then return it to your preferred setting, which keeps the internal spring mechanism from seizing in one fixed position over months of unchanged use.
✨ Don’t Miss These Exclusive Deals!
🔍 Take your office chair repair from “google it at 11pm” to “sorted by the weekend” with these carefully selected replacement parts. Click on any highlighted item to check current pricing and availability — your chair (and your back) will thank you!
DIY Chair Repair Parts vs Calling a Professional: Where’s the Line?
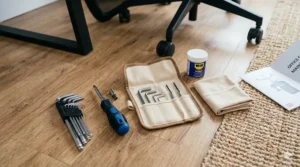
Most DIY chair repair parts covered in this guide — casters, armrest pads, hardware repair kits, and even a full cylinder swap — sit comfortably within reach of anyone with basic tools and twenty spare minutes, and reviewers across every part category here consistently describe successful first-time installs without professional help. Based on the spec comparison between DIY parts and professional office furniture repair services, the labour cost of calling someone out for a job that’s genuinely a screwdriver and a rubber mallet rarely makes financial sense.
Where the line genuinely shifts toward professional help is multi-part structural failure — a chair needing a new base, tilt mechanism and cylinder simultaneously starts to resemble a rebuild rather than a repair, and at that point a professional office furniture technician (or, frankly, a new chair) may be the more sensible route. There’s also a safety consideration worth taking seriously: the gas lift cylinder is a pressurised component, and while a purpose-built removal tool makes DIY replacement straightforward, anyone uncomfortable handling pressurised parts should reasonably hand that specific job to someone experienced.
Chair Longevity Tips: Getting 10+ Years From One Chair
The single biggest chair longevity tip is depressingly simple: fix small problems immediately rather than living with them. A slightly loose tilt bolt left alone for a year doesn’t stay a slightly loose bolt — it wears the mounting holes oval, which eventually means the whole mechanism plate needs replacing instead of a two-minute retightening job. The same logic applies to casters: a wheel dragging slightly because of wound-in hair puts uneven strain on the axle bearing, and what would’ve been a five-minute clean-out becomes a wheel replacement.
Beyond reactive fixes, genuine longevity comes from matching the chair’s weight rating to its actual use from day one — a cylinder or base rated right at the edge of expected load wears faster than one with real headroom — and from the quarterly maintenance routine covered earlier in this guide. Reviewers of long-lived chairs across multiple brands consistently point to exactly these two habits — quick fixes and realistic weight ratings — rather than any particular brand loyalty, as the actual difference between a chair that lasts three years and one that lasts ten.
Preventive Maintenance Guide: Stopping Problems Before They Start
A genuinely preventive maintenance guide focuses on the handful of failure points covered throughout this article before they become symptomatic. Every three months: clear caster axles of hair and debris, wipe down the cylinder casing, check and gently re-tighten every accessible bolt, and cycle the tilt tension knob through its full range to prevent the internal spring seizing in one position.
Annually, it’s worth doing a slightly more thorough check: sit in the chair and deliberately test full recline, full height range, and rock gently side to side to check for any base wobble that’s crept in unnoticed over months of daily use. Catching an early hairline crack in the base, or a tilt mechanism that’s started feeling gritty rather than smooth, at the annual check is meaningfully cheaper and easier than discovering it mid-collapse during a work call.
Repair vs Replace: Long-Term Cost Analysis
| Scenario | Typical Repair Cost | Typical New Chair Cost | Sensible Choice |
|---|---|---|---|
| Single part failure (cylinder, casters, or arm pads) | £10-£35 | £80-£300+ | Repair — clear cost win |
| Two related parts (e.g. cylinder + hardware kit) | £25-£50 | £80-£300+ | Repair — still strongly favours fixing |
| Three-plus structural parts (base, tilt, cylinder) | £75-£140 | £80-£300+ | Compare honestly — often close to a new budget chair |
| Chair over 8-10 years old with multiple failures | Varies widely | £80-£300+ | Often better to replace, especially budget-tier chairs |
Looking at the table, the maths stays firmly on the side of repair right up until you’re facing three or more simultaneous structural failures, at which point the combined parts cost starts closing in on what a decent new budget-tier chair would cost outright. Genuine review sentiment across repair-parts brands suggests most single-part failures — which represent the majority of real-world “my chair’s broken” situations — are comfortably worth fixing rather than replacing, both financially and in terms of the waste avoided.
Safety and Standards: What UK Buyers Need to Know Before DIY Repairs
Any office chair repair involving the gas lift cylinder deserves genuine respect, since the piston inside is pressurised — always use a proper removal tool rather than improvising with a screwdriver wedged under the seat plate, and never point the cylinder toward your face or hands during removal. The HSE’s own workstation checklist treats chair adjustability as a genuine health and safety factor rather than a comfort nicety, which is a reasonable frame for why fixing a sinking or non-adjustable chair promptly, rather than living with it for months, is worth prioritising.
For anyone working from home, it’s worth knowing that the HSE’s guidance on working with display screen equipment at home makes clear that employers still have a duty to ensure home workstations, chairs included, support a comfortable and sustainable posture — a genuinely useful bit of context if you’re weighing up whether to expense a repair part rather than pay for it yourself. Beyond the cylinder itself, general repair safety is straightforward: work on a stable, flat surface, keep fingers clear of pinch points around the base and mechanism during reassembly, and don’t exceed the stated weight rating of any replacement part, particularly on a base or cylinder that will be trusted with someone’s full bodyweight daily.
Frequently Asked Questions
❓ Why does my office chair keep sinking even after I adjust it?
❓ Can I fix a wobbly office chair myself?
❓ How do I know if it's the tilt mechanism or just the tension knob?
❓ Are universal office chair repair parts actually universal?
❓ Is it worth repairing an old office chair or should I just replace it?
Conclusion
The honest truth about most “broken” office chairs is that they’re not broken at all — one part has quietly failed while the rest of the chair carries on being perfectly sound, and figuring out which part that is turns an expensive-feeling problem into a genuinely cheap, genuinely quick fix. Whether that’s a sinking cylinder, a stubborn tilt mechanism, a squeaking caster, or arm pads that have simply had enough, the seven parts covered in this guide handle the overwhelming majority of real-world office chair complaints for less than the cost of a single new chair.
What actually separates a chair that lasts three years from one that lasts ten usually isn’t the brand on the box — it’s whether small problems get fixed the week they show up, or ignored until they take the whole mechanism down with them. Measure twice, order the removal tool alongside whatever you’re actually replacing, and don’t let a fifteen-minute fix talk you into an unnecessary chair-shopping afternoon.
✨ Ready to Fix Your Chair This Weekend?
🔍 Compare current prices on the repair part that matches your chair’s specific symptom, and check availability before you need it in a hurry. The right £20 fix could easily buy your chair another five years of honest service!
Recommended for You
- Leather vs Fabric Office Chair: 7 Honest Picks Tested (2026)
- Eco-Friendly Office Chair Mat: 7 Best Non-Toxic Picks for 2026
- Best Office Chair Mat UK 2026: 7 Durable Floor Protectors Reviewed
Disclaimer: This article contains affiliate links. As an Amazon Associate, I earn from qualifying purchases. If you purchase products through these links, we may earn a small commission at no additional cost to you.
✨ Found this helpful? Share it with your friends! 💬🤗
